Post Q2 Term Grades
This page explains how to post your grades in X2-Aspen.
- Step 1 -Update Post Columns – How to copy your Aspen Gradebook quarter averages to the post columns
- Step 1.5 – Rounding a Student’s Grade (Optional) – What to do if you want to round a student’s grade
- Step 2 – Post Grades – How to post grades
- Step 3 – Sanity Check!
Here is what you need to do.
Step 1 – Update Post Columns
-
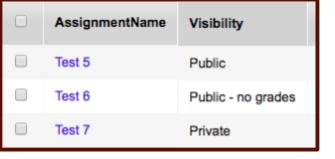
Make sure that all assignments from the quarter are marked as Public.
You can see which assignments are public by looking at the icon at the top of the assignment column in the Scores tab.

In the example above,
- Test 5 is Public (assignment details and grades visible to students and parents) as indicated by the small green check in the icon on the left.
- Test 6 is Public – No Grades (assignment details visible to students and parents, grades NOT visible or included in grade calculations they can see), as indicated by the blue circle icon with the exclamation point.
- Test 7 is Private (assignment details and grades NOT visible to students and parents or included in grade calculations they can see), as indicated by the small red circle in the icon on the left.
You can click on the icon to cycle the status of an assignment through the three options.
You can also see which assignments are not public by going to the Gradebook, and then clicking on the Assignments side tab. See below. The assignments shown here are Public. Any assignment marked Public – no grades or Private in the Visibility column needs to be changed to Public.
Go to the Scores tab and make sure you have entered all of your assignment grades. It’s easy to forget to enter those makeups!
You may want to round some quarter grades up to the next higher grade. You can do that just before you post – see the section below.
-
If you gave an exam, enter those grades now.
To enter exam grades, select Post Columns – Term from the Grade Columns drop-down. The column for the midyear exam is T2Exm. If this is a semester-long class, the exam grades must be entered before updating the post columns, as Aspen will calculate the course grade as part of the Update Post Columns routine. Aspen calculates grades the following way:
If you gave an exam, each quarter counts as 40% of the grade, and the exam as 20% of the grade.
If you did not give an exam, each quarter counts as 50% of the grade.
If you wish to use a different weighting system, you will need to calculate the grade outside of Aspen, and then enter the course grade manually.
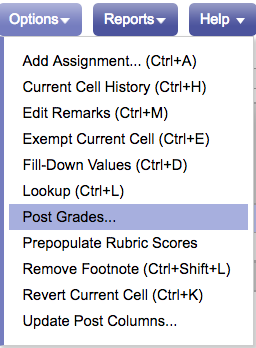
- Click on Options – Update Post Columns …

- From the Grade Term dropdown, select Q2. From the Grades to update dropdown, select Term grades for YOG 2018 if you are posting grades for seniors, and Term grades for YOG 2019, 2020, 2021 if you are posting grades for your other students.
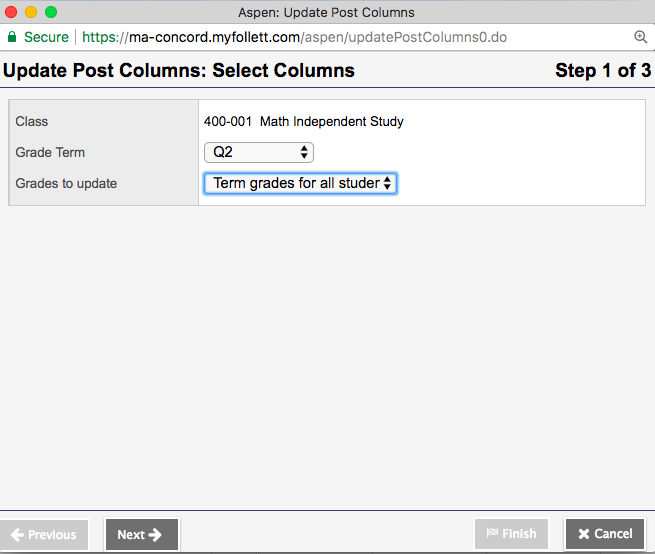
Click Next.
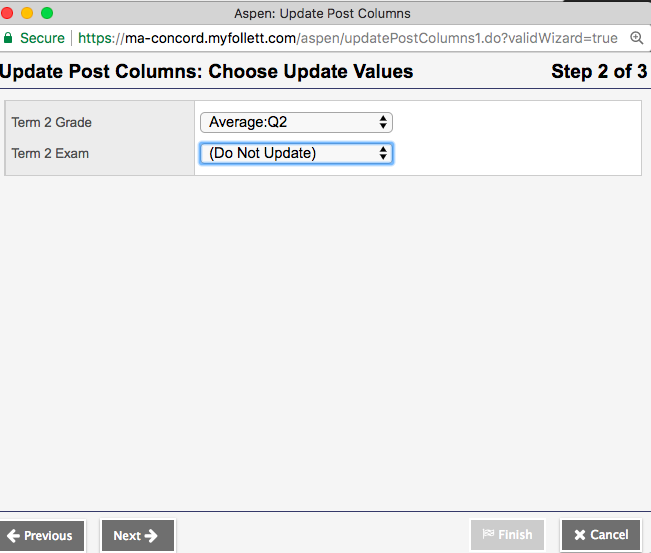
- You should see Average:Q2 in the Term 2 Grade drop-down. Leave the Term 2 Exam field set to Do not update.
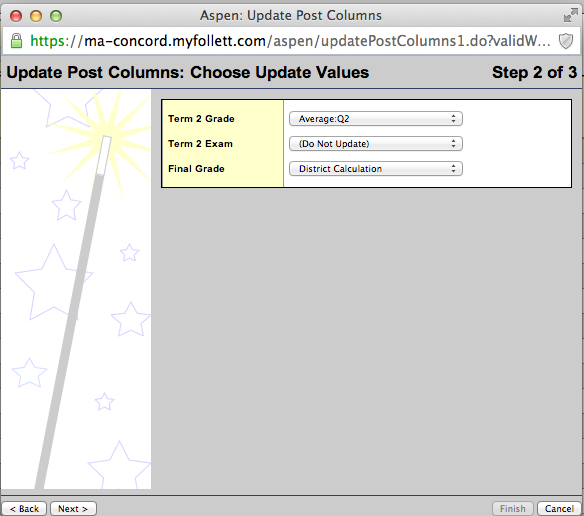
Semester course: You will see a drop-down menu for Final Grade. If you want Aspen to calculate the course grade (with a weighting of 40% per quarter and 20% for the exam), leave this set to District Calculation. Otherwise, select Do not update.
Note that if this is a year-long course that you won’t see the Final Grade menu.
When you are finished, click Next.
- You should now see the screen below. Click Finish. Your Quarter 2 Averages will be copied into T2Grd (the Quarter 2 Post Column). If this is a semester-long course, the course final grade will be copied into the Final Column.
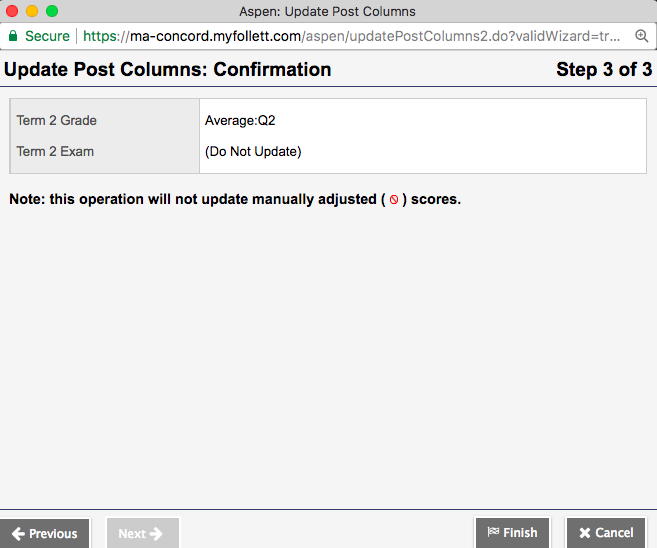
See Step 2 – Post Your Grades for how to post your grades.
Return to top of page.
Step 1.5 – Rounding a Student’s Grade (Optional)
Before posting your grades, look at the quarter averages (and final grade, if this is a semester-long course) for your students. If you want to round a student’s grade, overwrite the average with the lowest grade in the next higher grade category.
For example, suppose a student has an average of 82.9, and you want to round this student’s grade to a B. Overwrite the 82.9 in the T2Grd column with an 83. The reason for this is that Aspen uses the grade in the post columns to calculate the course grade. If you enter a letter grade of B, Aspen will use a grade of 85 (the middle of the range for B) when calculating the course grade, which is inaccurate and provides the student with additional points you may not have intended for final grade determination.
Step 2 – Post Your Grades
- Go to the Scores tab and select Post Columns – Term from the Grade Columns drop-down menu. You should see your students’ quarter averages in the T2Grd column, and the exam grade in the T2Exam column. If this is a semester-long course, you should also see the final course grade. Note that these grades are numbers, but the corresponding letter grades are printed on report cards and transcripts that are sent to colleges.
If you have students who have not completed all of the work, or have withdrawn, or are not being given a grade, you should overwrite whatever grade is in the post column with the appropriate grade. Here are the other grades you can enter in the post columns:
| Grade | Explanation |
| P | Pass |
| AU | Audit |
| N | No Grade |
| X | Medically Excused |
| I | Incomplete |
| WP | Withdraw Passing |
| WF | Withdraw Failing |
| W | Withdraw |
- Click on Options – Post Grades …
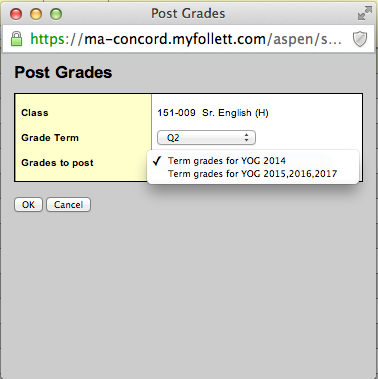
- You will see the screen below. There are no options here – just click OK.
- Your grades are now posted. Note that you can go back and repost your grades as often as you like while the grading window is still open.

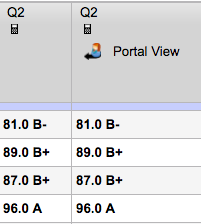
Step 3: Sanity Check
Under the Q2 Column, you will see an icon with a black arrow. 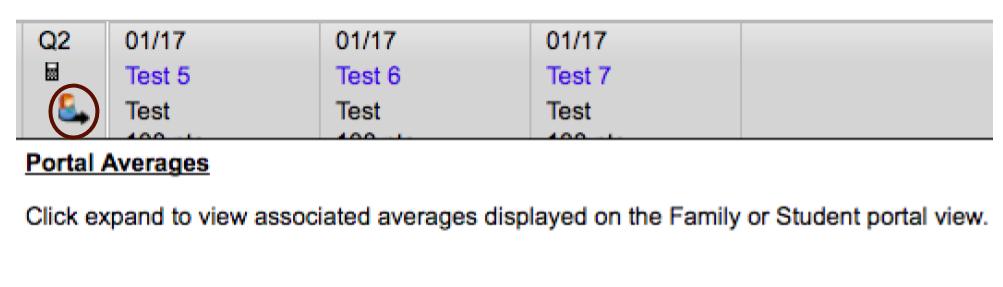
Clicking on the icon opens a new column titled ‘Portal View’. This is the grade your students and their parents will see.
Grades arent’ the same? The most common reason that the grades appear differently is that an assignment is not set to public. Click here to go back to the part of this page discussing Assignment visibility.